TUTORIAL

OUR STEP-BY-STEP GUIDE AND CUSTOMER SUPPORT TEAM WILL ENSURE THAT YOU SET UP YOUR IPTV AND START WATCHING OVER 40.000+ CHANNELS /Vods IMMEDIATELY AFTER YOUR ORDER!

Setup instruction for a Samsung/LG Smart TV or Amazon Fire Stick. iptv Smarters Pro service uses a media controller app called ‘Smart IPTV’, this app is free to use for a period of seven days, you will then be asked to make a one-time donation of € 5.49 (Euros) towards the Smart IPTV app development.

1 – Download Smart IPTV into your TV

( This is only for Samsung and LG Smart TV )

    1.Go to your TV apps store
    2.Search for Smart IPTV
    3.Install Smart IPTV and open Smart IPTV
Now you can see your MAC address on the right side of your screen
  • 2- Add channels into Smart IPTV
      1.Go to www.siptv.eu/mylist/
      2.Add your MAC and your M3U Subscription URL
      3.Click on Add Link
    • Make a note of the ‘MAC Address’ which is displayed on the screen.
  • Go to http://siptv.eu/mylist/ from any web browser.
  • Go to the section ‘Add external playlist links (URLs)’ and enter your ‘Mac’ address and the  subscription URL into the ‘Link’ field.
  • Ensure the ‘countries’ drop-down selection on ‘Various’.
  • Check in the ‘Keep online’ checkbox.
  • Click on the ‘Add Link’ button
  • Restart the ‘Smart IPTV’ app or TV.
  • In order to view channel groups, press the blue button on your remote control.
     

How to install IPTV Smarters Pro on FireStick.

Even though IPTV Smarters Pro is listed on Google Play Store and Apple App Store for Android and iOS mobiles respectively, Amazon Store does not host it. Therefore, if you want it on your FireStick, you will need to sideload it. We will download IPTV Smarters APK using the Downloader app.
1. We will first install the Downloader app

This app will help you sideload IPTV Smarter on FireStick (because browser downloads are not allowed)

You may also read our detailed guide on how to sideload apps on FireStick with Downloader

2. Click the Find > Search option on the home screen of FireStick

3. Type the name of the app (which is Downloader)
Click the Downloader option when it is displayed in the search results
Choose the Downloader icon on the following screen and download and install the app

4. Get back to the home screen of FireStick after installing the Downloader app

In the menu bar, click Settings

5. In the Settings, choose the option My Fire TV

6. When the following set of options are displayed on the next screen, click Developer Options

7. Click Install from unknown apps

8. Click Downloader to change the status to ON

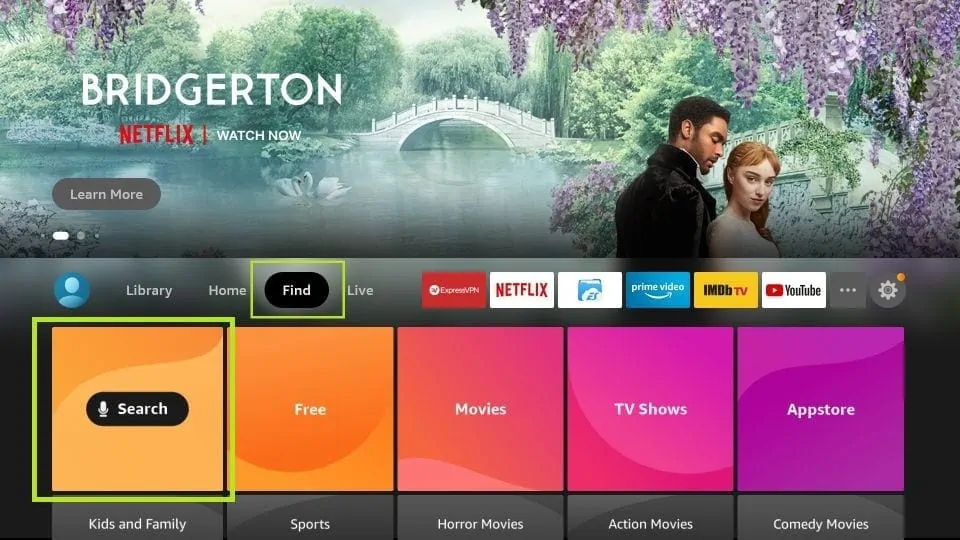
With this, you have configured the FireStick settings to allow the installation of IPTV Smarters and other third-party apps. Follow the steps below:

9. You may now open the Downloader app
When you run this app for the first time, a set of prompts will appear. Dismiss them until you see the following screen

On this screen, you need to click the URL textbox on the right side (make sure Home option in the left menu is selected) where it says ‘http://’

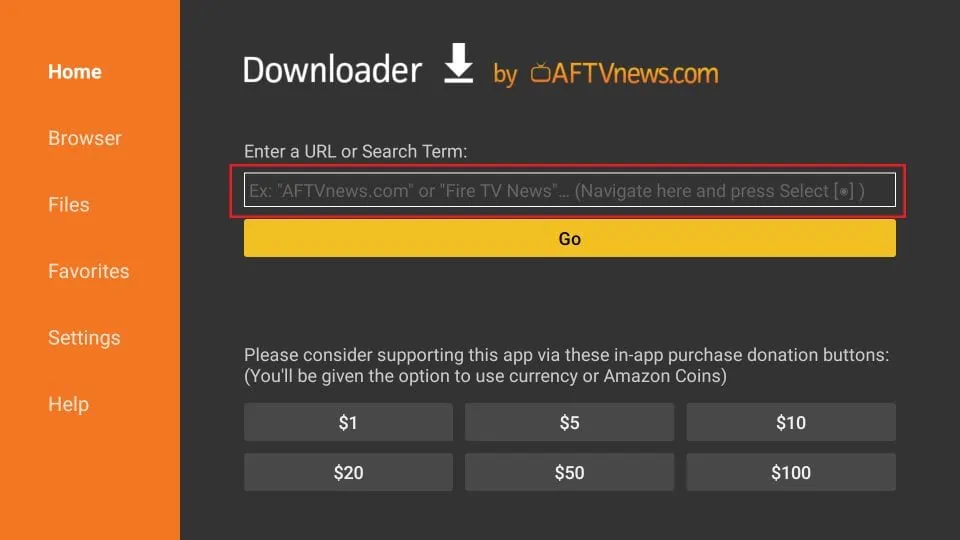
10. Go ahead and enter the following path on this window and Paste One Of the Following urls Do Download the App: 

URL1: https://www.iptvsmarters.com/smarters.apk

URL2:https://www.firesticktricks.com/smarter

Click GO

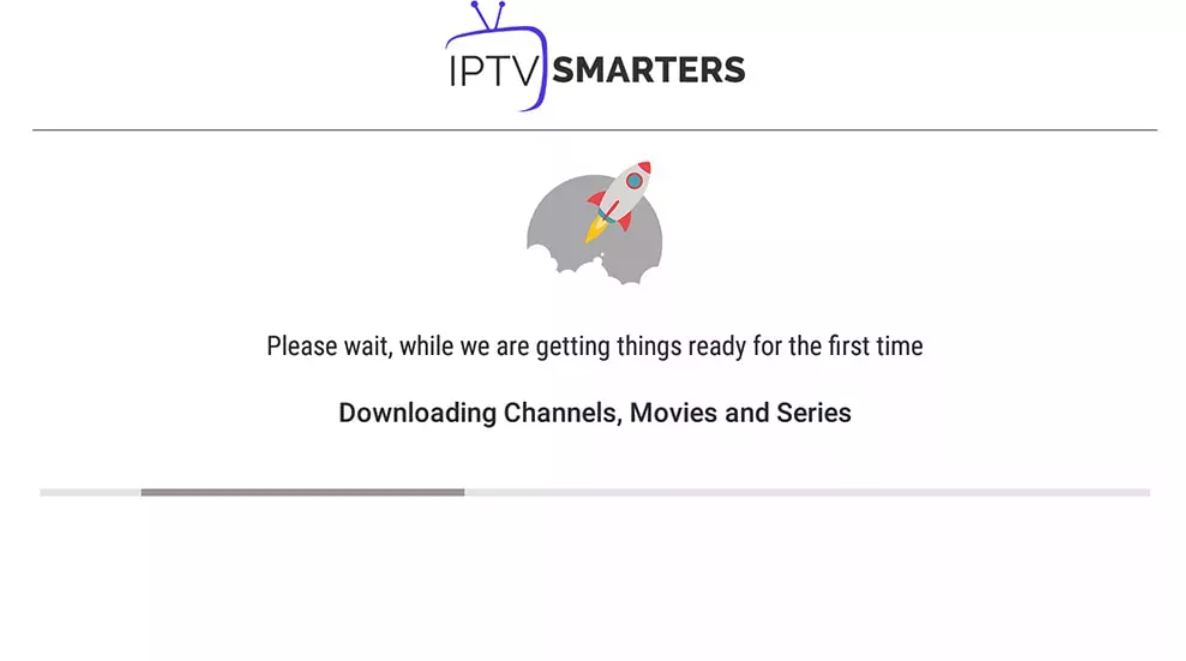
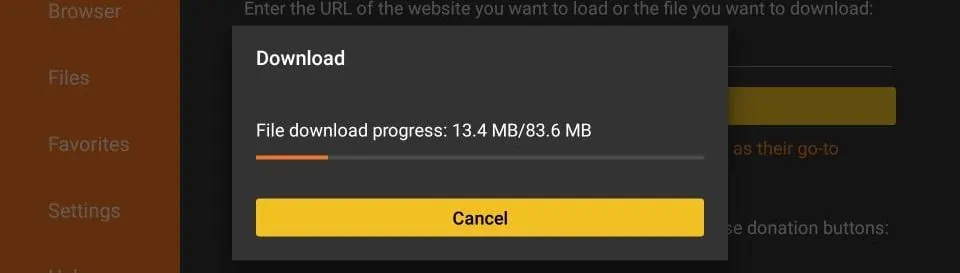
11. Give it a minute or two until the IPTV Smarter is downloaded onto your FireStick device

iptv smarters download

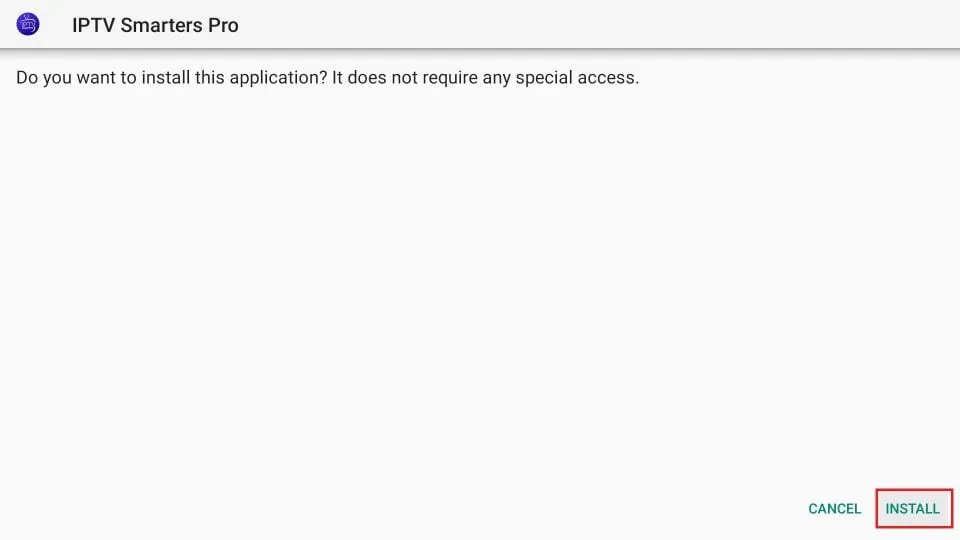
12. When the download has completed, the Downloader app will run the APK file and the installation will start

Click Install

steps to install iptv smarters

13. Wait for the installation to finish

how to use iptv smarters on Firestick

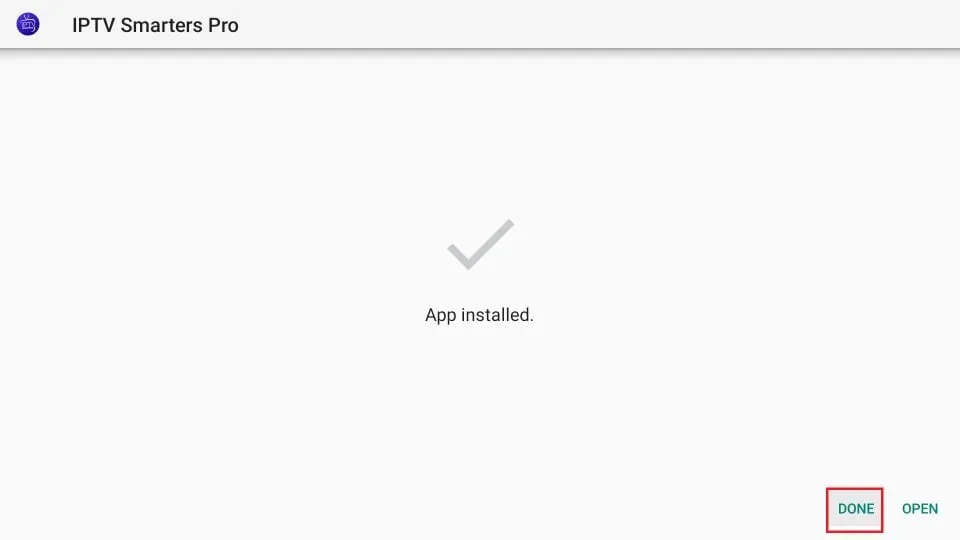
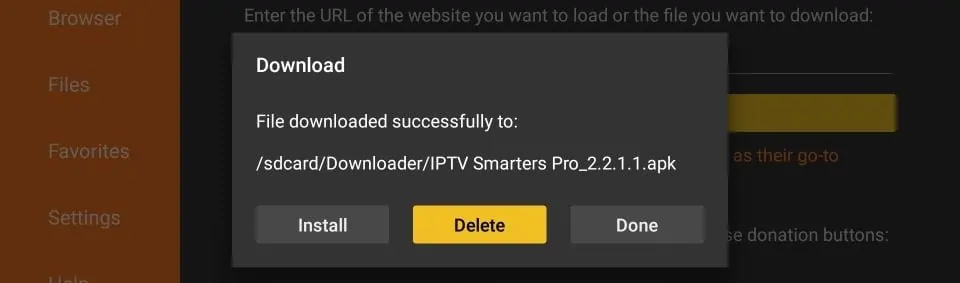
14. Installation is concluded with the App installed notification

You may now choose to click OPEN and get started with IPTV Smarters

I recommend choosing DONE so that you may first delete the APK file and save some space on the FireStick storage

set up iptv smarters on Firestick

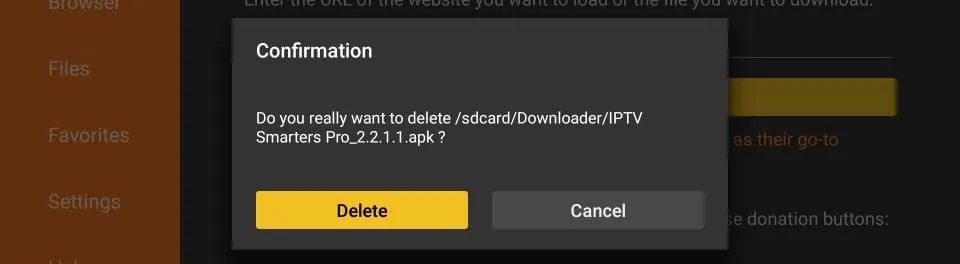
15. If you clicked DONE above, you will be back on the Downloader interface

Click Delete

iptv smarters for Firestick

16. Again, click Delete

how to install iptv smarters on firestick

Great! You now have the IPTV Smarters app on FireStick.

How to use IPTV Smarters on FireStick

Note: If you want to know how to access IPTV Smarters or other installed apps on FireStick, please refer to the next section

As I said before, IPTV Smarters DOES NOT have any channels of its own. It is just a facilitator which lets you stream channels you have access to through the IPTV service providers.

Therefore, to use IPTV Smarters, you must have subscribed to at least one IPTV service.

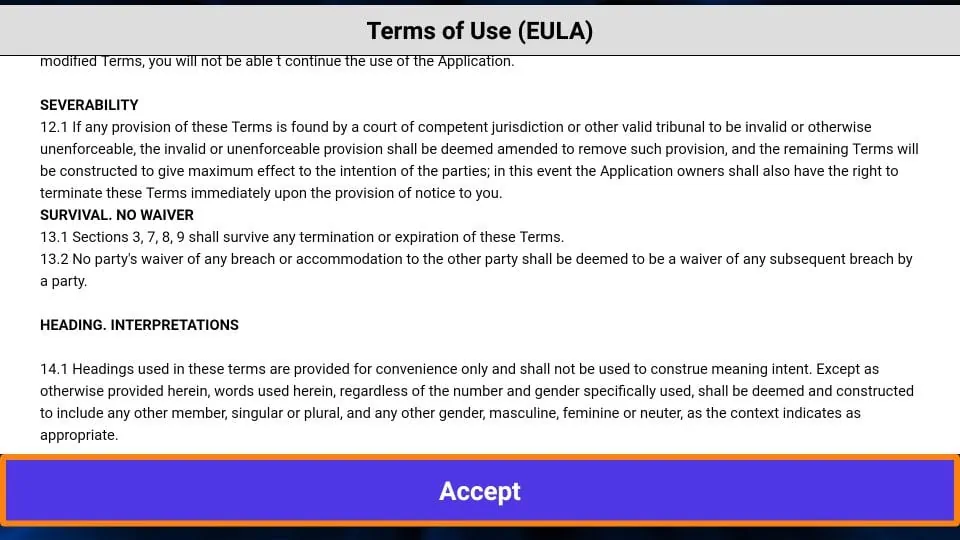
When you run the IPTV Smarters app for the first time, Terms of Use will be the first window. Scroll down and click Accept

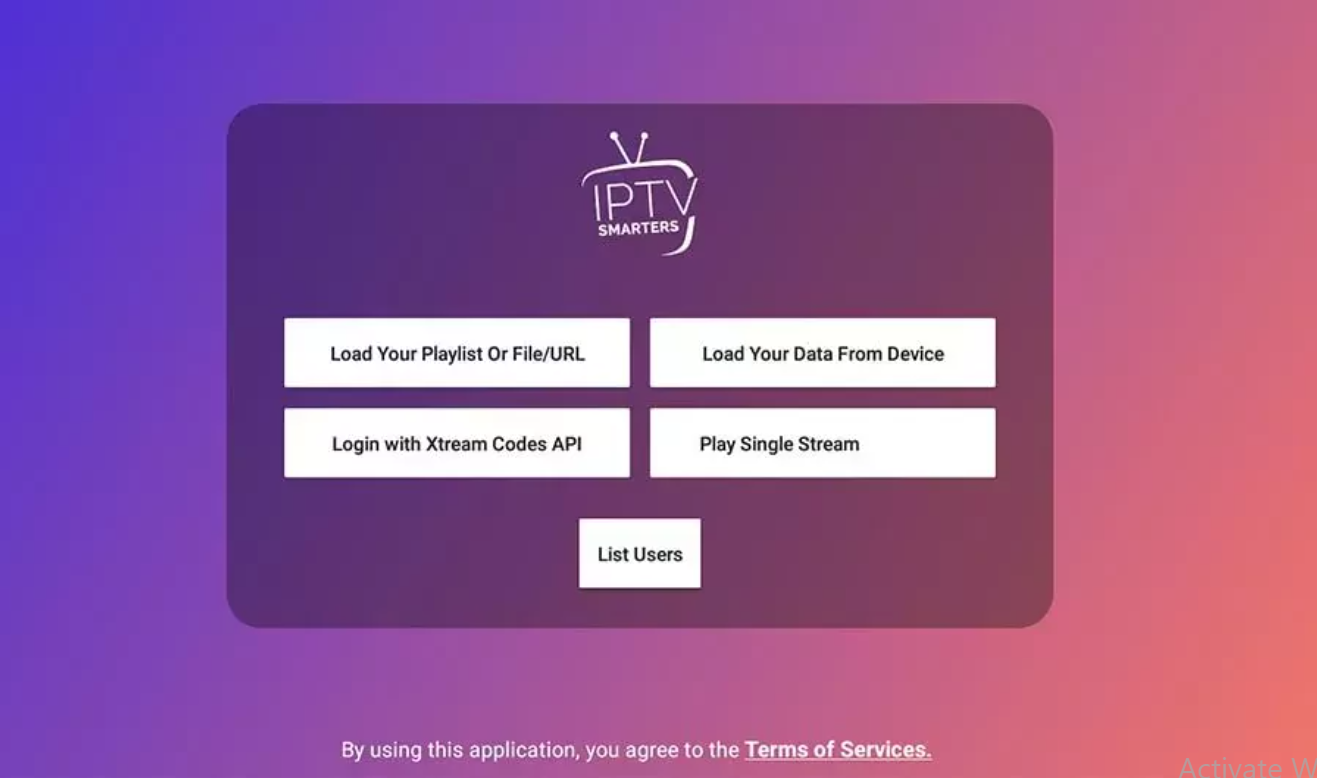
This is the window that you land on next. You need to get started by clicking either ADD USER in the top-right corner or ADD NEW USER in the middle of the screen

iptv smarters guide

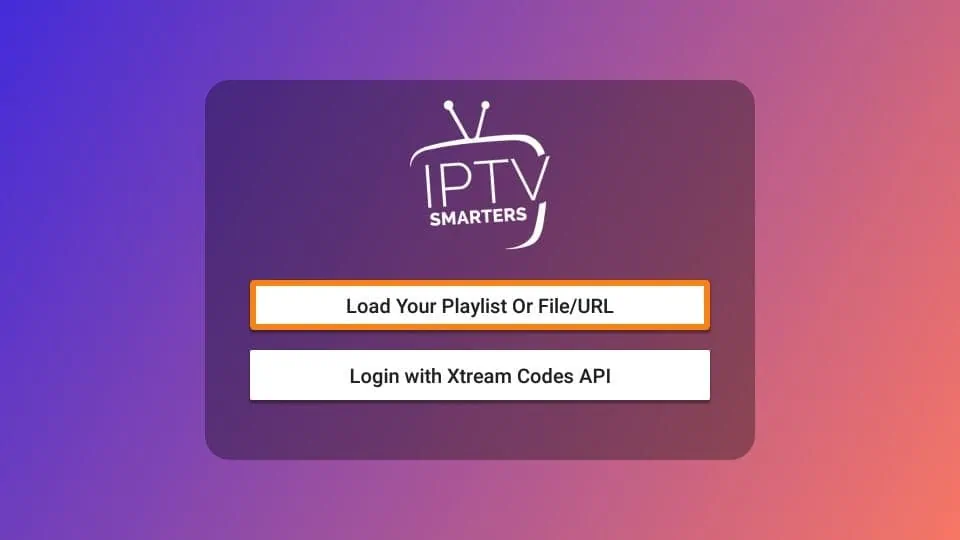
There are two ways to sign in to your IPTV service on IPTV Smarters

  • Load Your Playlist or File/URL
  • Login with Xtream Codes API

using iptv smarters on Firestick

Load Your Playlist or File/URL

Your IPTV service MUST support the M3U playlist in order for you to use it with IPTV Smarters. Not all the IPTV services do.

Typically, the IPTV service provider sends an email to you with the login details once you have successfully purchased their subscription plan. This email also contains the M3U Playlist and EPG links. If you haven’t received the links, you may contact the IPTV provider.

When you choose the Load Your Playlist or File/URL option, the app may ask you for permission. Click Allow

iptv smarters on amazon Firestick

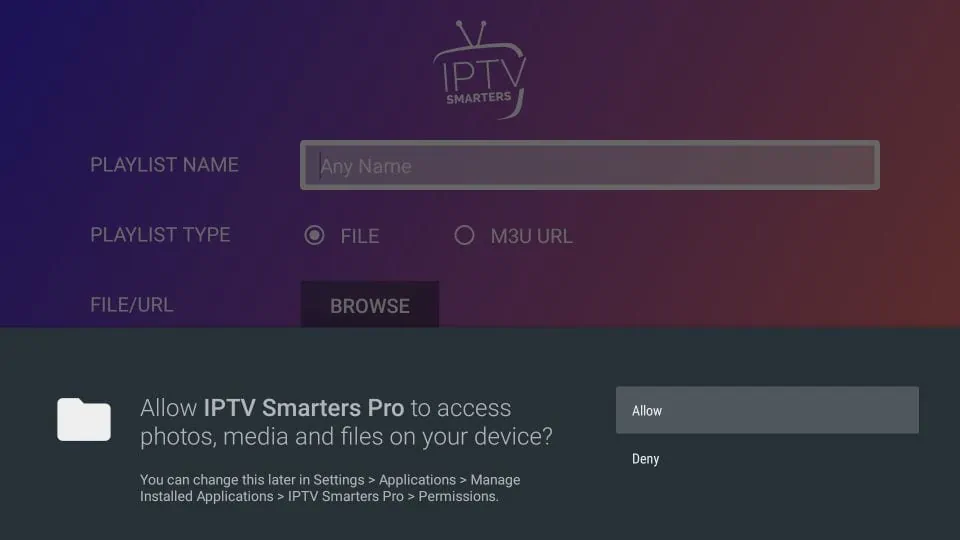
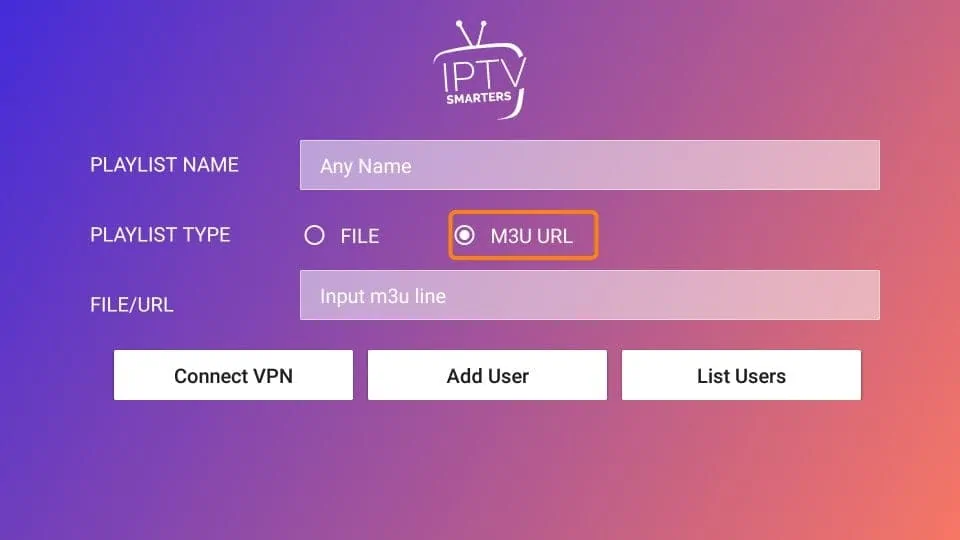
Here is the screen where you can enter the M3U playlist link. Make sure you choose the M3U URL radio box in the Playlist Type section

In the Playlist Name section, type any name you like

In the File/URL section, type the M3U URL

Click Add User button

iptv smarters

Login with Xtream Codes API

M3U playlist URLs are often long and difficult to type into the app, especially if you are typing with the FireStick remote.

Therefore, I recommend using the Xtream Codes API instead. They are shorter and easier to type.

However, Xtream Codes has been taken down and I am not sure if the API Codes will work any longer.

Read: Authorities Target IPTV Providers, Xtream Codes Taken Down

Xtream Codes API is sent to you in your email by your IPTV provider along with your M3U playlist URL. If you haven’t received them, contact your IPTV provider.

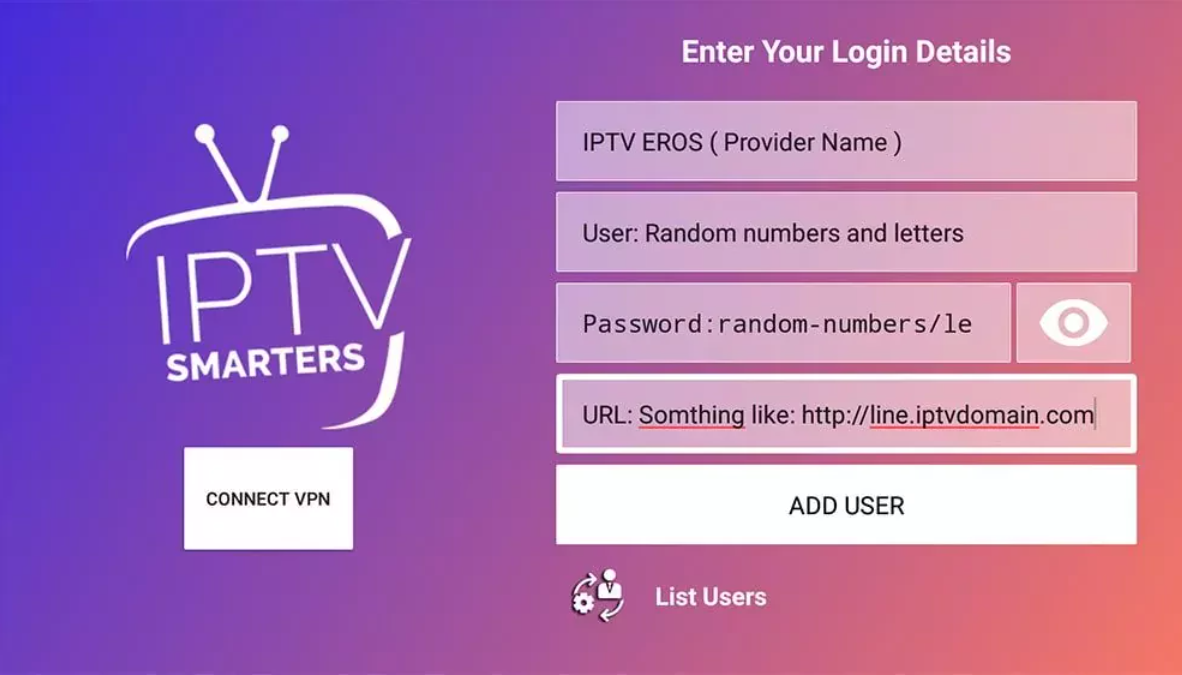
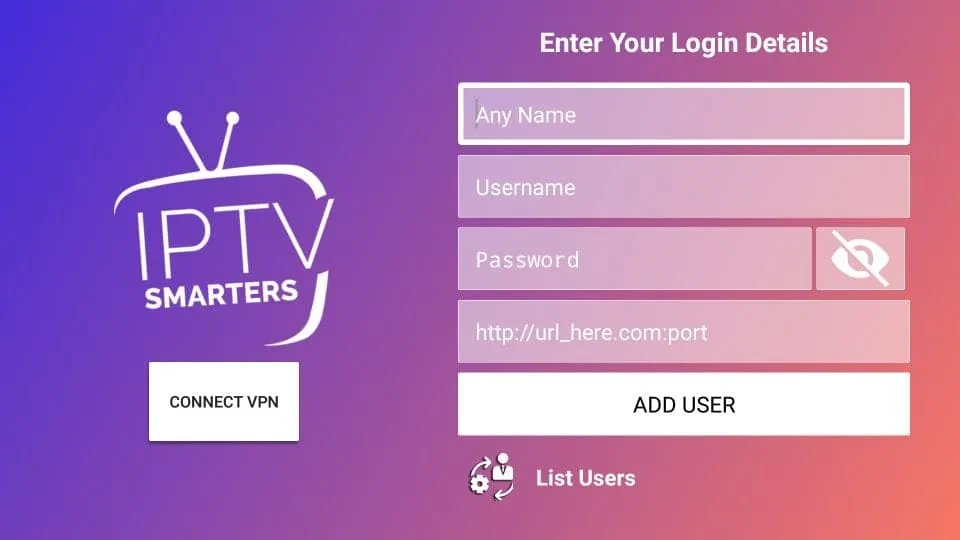
When you click Login with Xtream Codes API here is the window where you can enter your details:

install iptv smarters on fire stick


Download VLC ( Download URL https://www.videolan.org/vlc/index.html)
  • Open VLC Player

  • Go to Media -> Open Network stream.
  • Add your Subscription URL we sent to you and press play.
  • Wait till all the Channels load (this may take some time)
  • Enter Username and Password to verify.
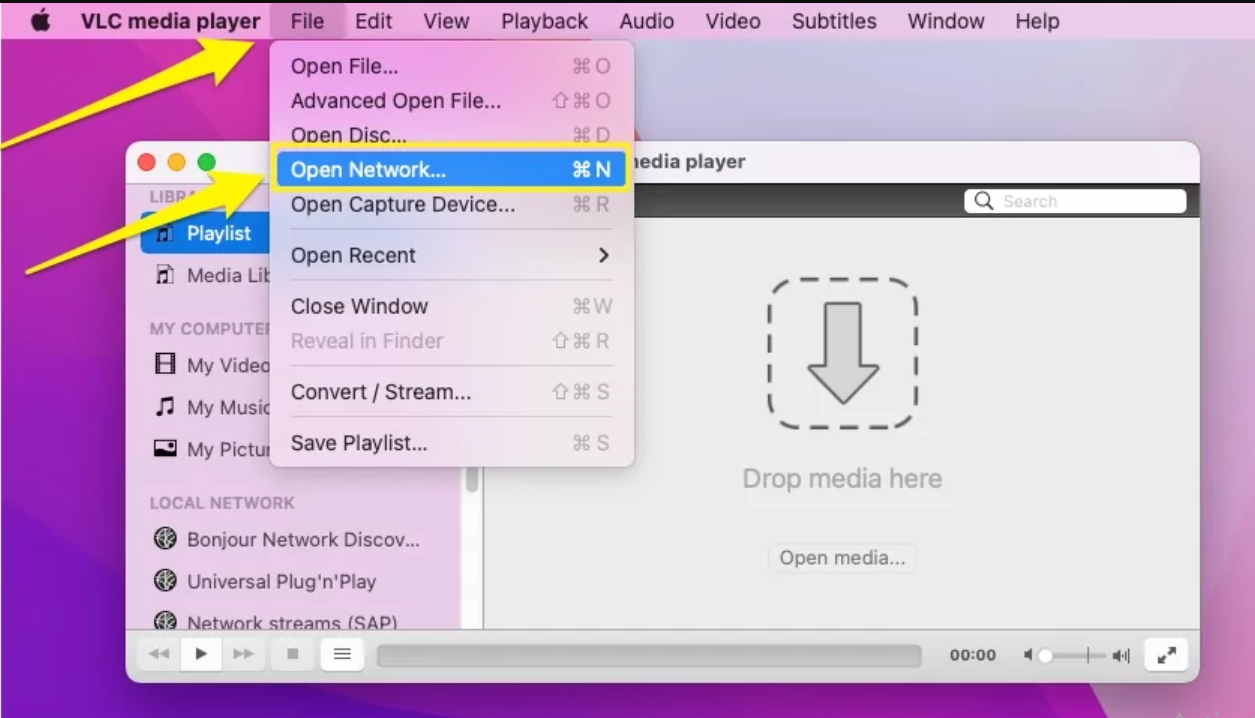
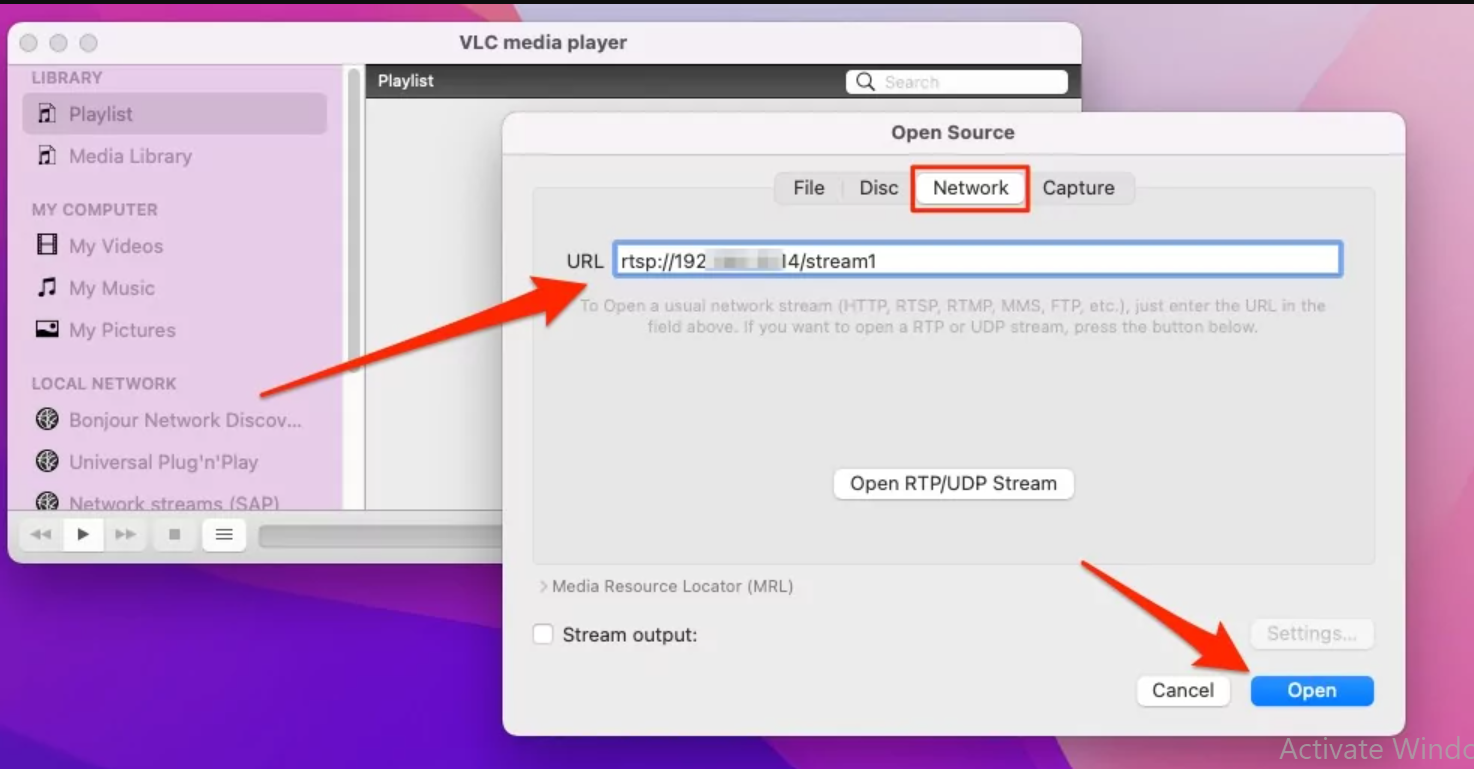
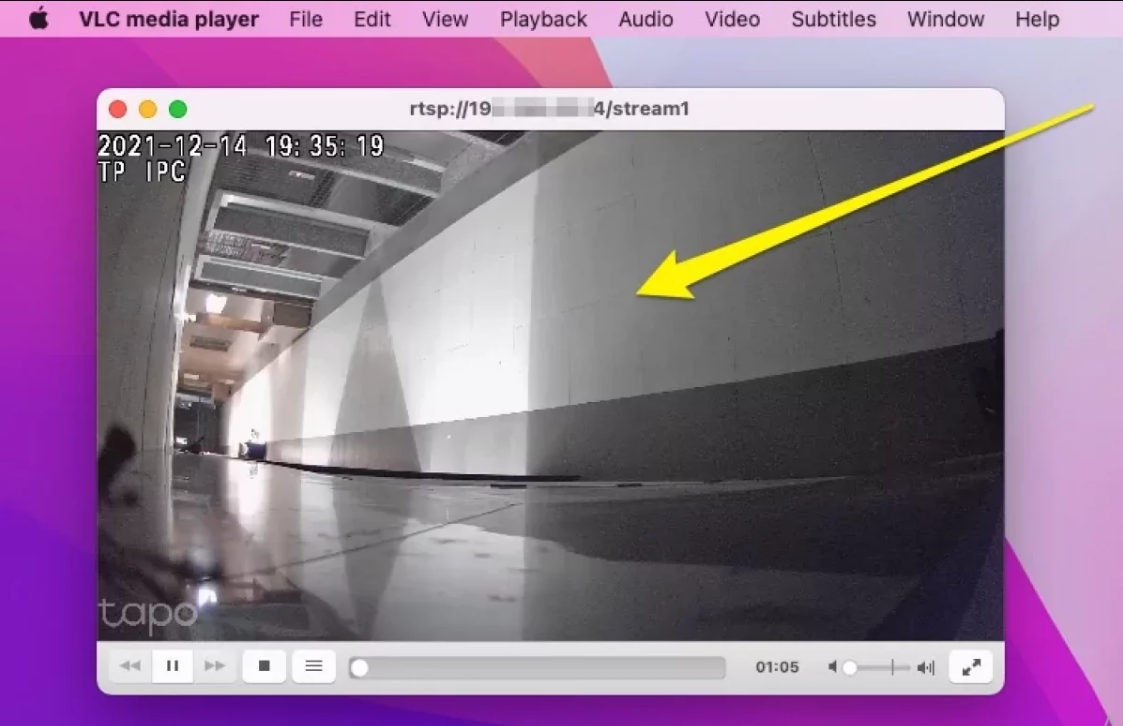
  • Next, click ‘Open’ to load the stream, and voila! You can now enjoy the RTSP stream on your VLC for Mac.

    Note: VLC also supports other online streaming formats like HTTP, RTMP, MMS, FTP, etc. You can open a network stream on VLC simply by entering the URL of the stream in the URL field, as you see in VLC at the top of the player. To open an RTP or UDP stream, you can press the button at the bottom of the screen.

    Move your VLC Window Player at the top of the window, Go to Video > Flot on top

    The VLC Media

    How to Rotate RTSP Video on VLC Mac?

    Rotate Camera is not easy to handle on VLC Mac Player. But you have to do it manually from the VLC Player settings as below,

    1. From top Menu > Windows > Video EffecTS
    2.  
    3. Under the Geometry > Select Transforms > And Rotate by 90 degrees. That’s it. 

    The Best RTSP Players for Mac: Alternatives to the VLC Media Player

    While VLC can undoubtedly facilitate seamless RTSP streaming on your Mac, there are other competitive alternatives and can get your requirements done just as efficiently. Let us explore a couple of these options

  •  Player is capable of premium-quality streaming, but one might wonder if it really is the best choice for RTSP streams. Read on to
  • Choose a Channel and enjoy the 

open the app store/ Playstore and search for IPTV-Smarters Player click install and that’s it you now have the IPTV Player on your device all is left to do is connect to your IPTV:

1- Open IPTV Smarters Player

to start the configuration, search for the app that you’ve just installed on you Apple TV it comes with the name of IPTV Smarters click on the app icon to open it.

2- Accept the terms of use

if this is your first time using this app, you will see a notice asking you to accept the terms of use before using the player, all you have to is click on accept.

3- Choose Xtream Codes API

after accepting the terms you will see the login dashboard, which will give you the option to connect to your IPTV provider using any method you like.

I will recommend you to go with the Xtream Codes API because it is faster when it comes to updating the channels list and the EPG is integrated with it.

4- Enter your account details

most IPTV providers will send you the m3u you link and the EPG link, if you don’t see the Xtream Codes API don’t worry because you can easily extract it from the m3u link using this method.

your provider will give a link that look very similar to this.

http://line.iptvdomain.com/get.php?username=XXXXX&password=XXXXX&type=m3u

  • URL: is the first part: http://line.iptvdomain.com/
  • Username: is the XXXXX after ?username=, in your case they will be some random charecters
  • Passwrod: the same as the username the XXXXX part after &password=

before clicking on add user make sure to double check if you made any typo because if you missed one letter or a number you will not connect to the server.

5- Wait until the app loads the channels

if you’ve entered everything in the right order the IPTV player will automatically start to download the channels which will take from 1 to 4 minutes depending on how fast your connection.

Using iPlay TV
THE PRO IPTV
THE PRO IPTV
THE PRO IPTV
THE PRO IPTV
Then Add M3U URL
Then Add IPTV SHOP
Go to Google Play store and download Perfect Player IPTV
Please follow all 14 steps
  • Open Perfect Playe
    THE PRO IPTV
  • Go to Settings
    THE PRO IPTV
  • Now you are into Settings Page, Go to General
    THE PRO IPTV
  • Go to Playlist and enter Your URL and add by Name ALL IPTV after you done click on OK
    THE PRO IPTV
  • Go to EPG
    THE PRO IPTV
  • Enter your EPG URL after you done click on OK
    THE PRO IPTV
  • Go back to your Settings Page and go to Playback
    THE PRO IPTV
  • Check ONLY change system volume
    THE PRO IPTV
  • Go back to your Settings Page and go to GUI
  • Check ONLY Show channels as group folder
  • Restart Perfect Player
  • Now you see channels list on the left side
  • Press left the button on the remote controller now you have all channels on group folder
  • Go to any folder and enjoy to watch all channels
How to Setup PVR IPTV Simple Client Kodi Krypton 17
THE PRO IPTV
Open KodiSelect TV
THE PRO IPTV
Select Enter add-on browser
THE PRO IPTV
Select PVR IPTV Simple Client
THE PRO IPTV
Select Configure
THE PRO IPTV
Select General
THE PRO IPTV
If you have your subscription m3u URL set Location to Remote Path
THE PRO IPTV
Then Select M3U PlayList URL
THE PRO IPTV
Enter the URL of your M3U PlayList and select OK
THE PRO IPTV
If you have an M3U text file stored locally on your network/computer/box then set the Location to Local Path (include Local Network)
THE PRO IPTV
Then Select M3U PlayList URL
THE PRO IPTV
Navigate to where the file is stored and select it
THE PRO IPTV
Select OK
THE PRO IPTV
THE PRO IPTV
Wait for notification of channels loaded
THE PRO IPTV
Now when you go back to the Home Screen and select TV it should look like this
THE PRO IPTV
  • Open Kodi
  • Select SYSTEM
  • Select TV (or Live TV if you are on a version lower than 15.2 and if you are then consider updating)
  • Select General
  • Select EnabledYou will now see a pop-up saying that you have no PVR Client enabled.
  • Select OK
  • Scroll down and select PVR IPTV Simple Client
  • Select Enable
  • Select Configure
  • In General select M3U PlayList URL
  • Add your M3U URL into the address section
  • Select OK
  • Select OK again
  • Reboot Kodi
  • On your Home Screen, you should now see TV (or Live TV if on an older version of Kodi).
  • Open that to see the live channel list
  •  
This tutorial will guide you through the simple setup instruction for STB Emulator.‘STB Emulator’ can emulate the following IPTV set-top boxes.
IPTV Set-top Box Support
MAG200
Yes
MAG245
Yes
MAG250
Yes
MAG260
Yes
MAG270
Yes
MAG275
Yes
Aura HD
Yes

STB Emulator Setup Instructions:

  • 1. When you open the STB emu app for the first time you’ll see the screen below and from here you can select the “configure” option.

    2. If you see a bluescreen that’s completely normal. You can use mouse cursor of your firestick remote and select upper right hand to reveal on-screen remote. Click on the 3 dots to get the drop down menu and enter the settings.


  • 3. In the settings of the STB emulator app select “Profiles”.
  • 4. Hover over the “New Profile” option and once highlighted press enter . If you’re using multiple servers you can create more than one profile and switch between them.
  • 5. Next, go into “Portal Settings”.
  • 6. Here you’ll see ‘Portal URL’ as the first option. You will have to edit this field depending on which IPTV service you currently have. This should be given to you by your IPTV provider.

  • 7. Exit back one page, back to the profile settings from step 5, here select “STB configuration” option.

  • 8. Inside STB configuration you’ll see MAC Address beginning with 00:1A:79. This is the address you’ll need give your provider. It’s important you have the correct MAC address activated entered here as this is what enables STB emulator access to the server.

    In the case a MAC address was generated for you edit the default MAC to match one created.

  • 9. We’re done configuring the app, now just keep pressing back or exit until you see the blue screen. From here use the mouse cursor and select anywhere on the screen, this will reveal on-screen remote. Select the 3 dots on upper right hand side of the screen.
  • 10. This will bring up the drop down menu. Here select profile twice, this will make the screen flash and will restart the portal. If everything has been entered correctly and your service has been activated you’ll see a yellow loading bar.
  • 11. Another way to reload the portal is to select on the upper left hand side of the screen and you’ll see option titled “reload portal”.
  • Conclusion

    That’s all there’s to it, you should now know how to sideload applications like the STB emulator on your Amazon Firestick / Fire TV. Here’s a quick check-list you’re still having issues with the service is not working, just make sure you go through the following checklist:

    • Make sure to have the activated MAC address entered. You can always double check with your provider to confirm if the proper MAC address is being used.
    • Make sure correct URL has been entered in exactly. A single typo will result in an error message.
    • Make sure your device is connected to a network. This would be the most infuriating thing to discover what’s been holding you back so just double check network settings to make sure you have access to the internet.

    Hope this sheds some light and make the process of setting up a little easier.

MAG Box allows IPTV users to stream media on their TV. It also gives the functionality to play offline media from storage. All you need to do is connect it with the USB port. You can connect the IPTV provider with MAG to watch live TV. What many users find advantageous using MAG is that it supports stalker middleware and provides an Electronic Program Guide feature.

How to setup IPTV on MAG 250, 254 and 256

Configuring Network Settings


The very first thing you need to do after plugging in your device is to connect your device to the network settings. To know how to configure Network settings on a MAG device, follow the steps below.


Step 1: Launch Settings of your MAG 250, 254 or 256 devices.

Step 2: From there, go to the System Settings.

Step 3: Then, from there go to Network settings. Over there, you can either connect your device either via Ethernet or Wireless connection.

Once you are done configuring network settings, you need to find your MAC Address in the MAG box. To know-how let’s figure out.


If you want to get IPTV service working on your MAG 250, 254, or 256 devices, you will require an active IPTV subscription. You will require MAC Address when you will sign up with the provider. The MAC address starts with 00:1A:79. But in case you have purchased the service then need not worry since they must have generated one for you. You just need to contact them.

To identify your device and allow access to the portal, you need to refer to the bottom of your STB Box. There you will find a sticker with MAC: 00:1A:XX:XX: XX.

Configuring Settings of MAG Box


Now, since you have an activated MAC Address and our device is connected to the network, you can now start streaming the IPTV service. You must be wondering how? Let’s find out together.

Step 1: Launch System settings.

Step 2: Navigate yourself to the Servers option.

Step 3: Over there, select the “Portals” option

Step 4: Within the Portal menu, you will be able to add or change the Portal URL. You can write any name in the Portal 1 box. For Portal 1 URL you need to enter the Portal address which you can gather from the provider from whom you purchased the service.

Step 5: Save it. You can leave the Portal 2 name and URL field blank. In case you have multiple subscriptions to different IPTV servers, you can use Portal 2 name and URL field and with this option, you can choose between the two servers.

Step 6: Now, go back to the System settings and click on the restart portal option

If you did configure everything from network settings to entering the right portal URL, you will see a yellow loading bar.

After the URL is loaded successfully, you will see an interface with an EPG guide.

What if you wish to change the Portal URL? Or what if you already have your subscription and you just need to update the Portal URL? Follow the guide below to know how to change the portal URL of MAG 250/254/256:

In case you are looking for a guide to know how to update the Portal URL, then you have arrived at the right place. Why you exactly need a guide for updating the Portal URL is because whenever you turn on the device, it will redirect you to the portal which no longer exists. It then shows you an error where it recommends you to contact your provider.

To fix this, you need to unplug your device first and then plug it back in. It will reload the screen. You need to long-press the menu button.

Now, from there go to system settings, then servers and portal. Over there change the portal URL.

Wrapping Up

That is all you need to setup IPTV on MAG 250, 254 and 256. If you do end up configuring everything successfully, then your device and service shall work. You need to enter the correct MAC Address. If there is an error with your MAC Address, it will ask you to log in. There is no login and password. If it occurs, it simply indicates that the MAC Address you entered is wrong.

  • Go to your Enigma2 and get your IP address
Go to Settings/Setup/System Network Device Setup Adapter Settings
And get your IP address it starts with 192.168….
  • Go to your windows PC and download Putty Software
Putty dURLload URL https://the.earth.li/~sgtatham/putty/latest/x86/putty.exe
  • Open Putty add follow this steps
Add your IP address of your Enigma ( Same IP as step 1 ) Port 23 Connection type Telenet Click on open
THE PRO IPTV
  • Your default login and password are root
THE PRO IPTV
  • Copy your URL line ( you will get it after you order your subscription )
THE PRO IPTV
  • Use RIGHT CLICK MOUSE BUTTON after you enter your line press ENTER
THE PRO IPTV
  • Type reboot and your device will restart
THE PRO IPTV
Now you will find IPTV folder, all IPTV channels are inside your IPTV folder
This tutorial will guide you through the simple setup instruction for Dreamlink T1, T1+, T2, T6.
Obtaining MAC address from the device:
  • Let the STB Boot Up.
  • Finish any update that it may find.
  • It will bring you to the ‘Server menu’.
  • Press the ‘Exit’ button on the remote control and click on ‘OK’.
  • This will bring you to the main DOL screen, the ‘MAC address’ is in the upper right corner.
Dreamlink T1, T1+, T2, T6 Setup Instructions:
  • In ‘Dreamlink On Line (DOL) go to ‘Settings’.
  • Press the ‘Green’ button on your remote control to pull up the ‘Edit’ option.
  • Enter your ‘Portal name’ (use for example: ‘IPTV Shop’).
  • enter your ‘Portal URL’ (Check your activation e-mail).
  • Confirm, restart ‘Dreamlink’ and start watching.
Troubleshooting Dreamlink T1, T1+, T2, T6
If you have any problems viewing the Channels please follow this recommended fix:
Restart your Dreamlink and Wi-Fi Router.
This tutorial will guide you through the simple setup instruction for Openbox.
Openbox Setup Instructions:
  • Open ‘Intenet Browser’.
  • Copy and paste your M3U URL into the ‘Address bar’ and press ‘Enter’.
  • It will ask you to either ‘save’ or ‘save as’.
  • Choose ‘save as’ and change the file name to ‘THEPROIPTV’.
  • Copy the saved file from your computer to a USB stick then put the stick in the Back of the Openbox.
  • On the remote press the following:
– MENU
– Network Local settings
– Network App
– IPTV SHOP
– Yellow button to read from USB
– Start Watching right after Openbox says ‘success”
Troubleshooting Openbox
If you have any problems viewing the Channels please follow this recommended fix:Restart your Openbox and Wi-Fi Router.
This tutorial will guide you through the simple setup instruction for Avov Box/Formuler.
IPTVSMARTERS PRO service uses a free media controlled app called ‘TVOnline’.
TVOnline Setup Instructions:
  • From home screen click ‘Market’.
  • Click ‘TvOnline’ app.
  • Install ‘TVOnline’ app.
  • Wait for the installation to finish.
  • Enter ‘Server name’ (for example ‘IPTV SMARTERS PRO’)and enter ‘Portal link’ (Check your activation e-mail).
  • Click ‘Connect’ to start watching.
Troubleshooting Avov Box/Formuler
If you have any problems viewing the Channels please follow this recommended fix:
Restart your App, Avov Box/Formuler, and Wi-Fi Router.
IPTV SMARTERS APP TURORIAL
TUTORIAL
Scroll to top